Everything has finite resources, Services and Apis need to protect themselves from excessive use to maintain service availability. Even highly scalability systems should have limits on consumption at some level.
Rate Limiting is the answer and is a way for developers to control the number of allowed requests for a resource within a specific time window.
When too many users are accessing the API, a rate limit can be very useful.
In this article, I will show you how to implement Basic Rate Limiting in an ASP.NET Core Web API with the AspNetCoreRateLimit library
Also, .NET Announced built-in Rate Limiting support as part of .NET 7. (My next Article will be about implementing Rate limiting with .NET 7 built-in part)
It is possible to implement your Rate Limiter by adding middleware but there is already a nice library called AspNetCoreRateLimit.
You can access the GitHub page via the link below.
GitHub: https://github.com/stefanprodan/AspNetCoreRateLimit
Let's Create a Web API project.
I am going to add it using dotnet tool. Also, you can create it in visual studio
dotnet new webapi -o AspNetCoreRateLimitExample
You can access the repository on GitHub...
I will show it on the default created controller (WeatherForecastController)
using Microsoft.AspNetCore.Mvc;

namespace AspNetCoreRateLimitExample.Controllers;

[ApiController]
[Route("[controller]")]
public class WeatherForecastController : ControllerBase
{
    private static readonly string[] Summaries = new[]
    {
        "Freezing", "Bracing", "Chilly", "Cool", "Mild", "Warm", "Balmy", "Hot", "Sweltering", "Scorching"
    };

    private readonly ILogger<WeatherForecastController> _logger;

    public WeatherForecastController(ILogger<WeatherForecastController> logger)
    {
        _logger = logger;
    }

    [HttpGet(Name = "GetWeatherForecast")]
    public IEnumerable<WeatherForecast> Get()
    {
        return Enumerable.Range(1, 5).Select(index => new WeatherForecast
        {
            Date = DateOnly.FromDateTime(DateTime.Now.AddDays(index)),
            TemperatureC = Random.Shared.Next(-20, 55),
            Summary = Summaries[Random.Shared.Next(Summaries.Length)]
        })
        .ToArray();
    }
}
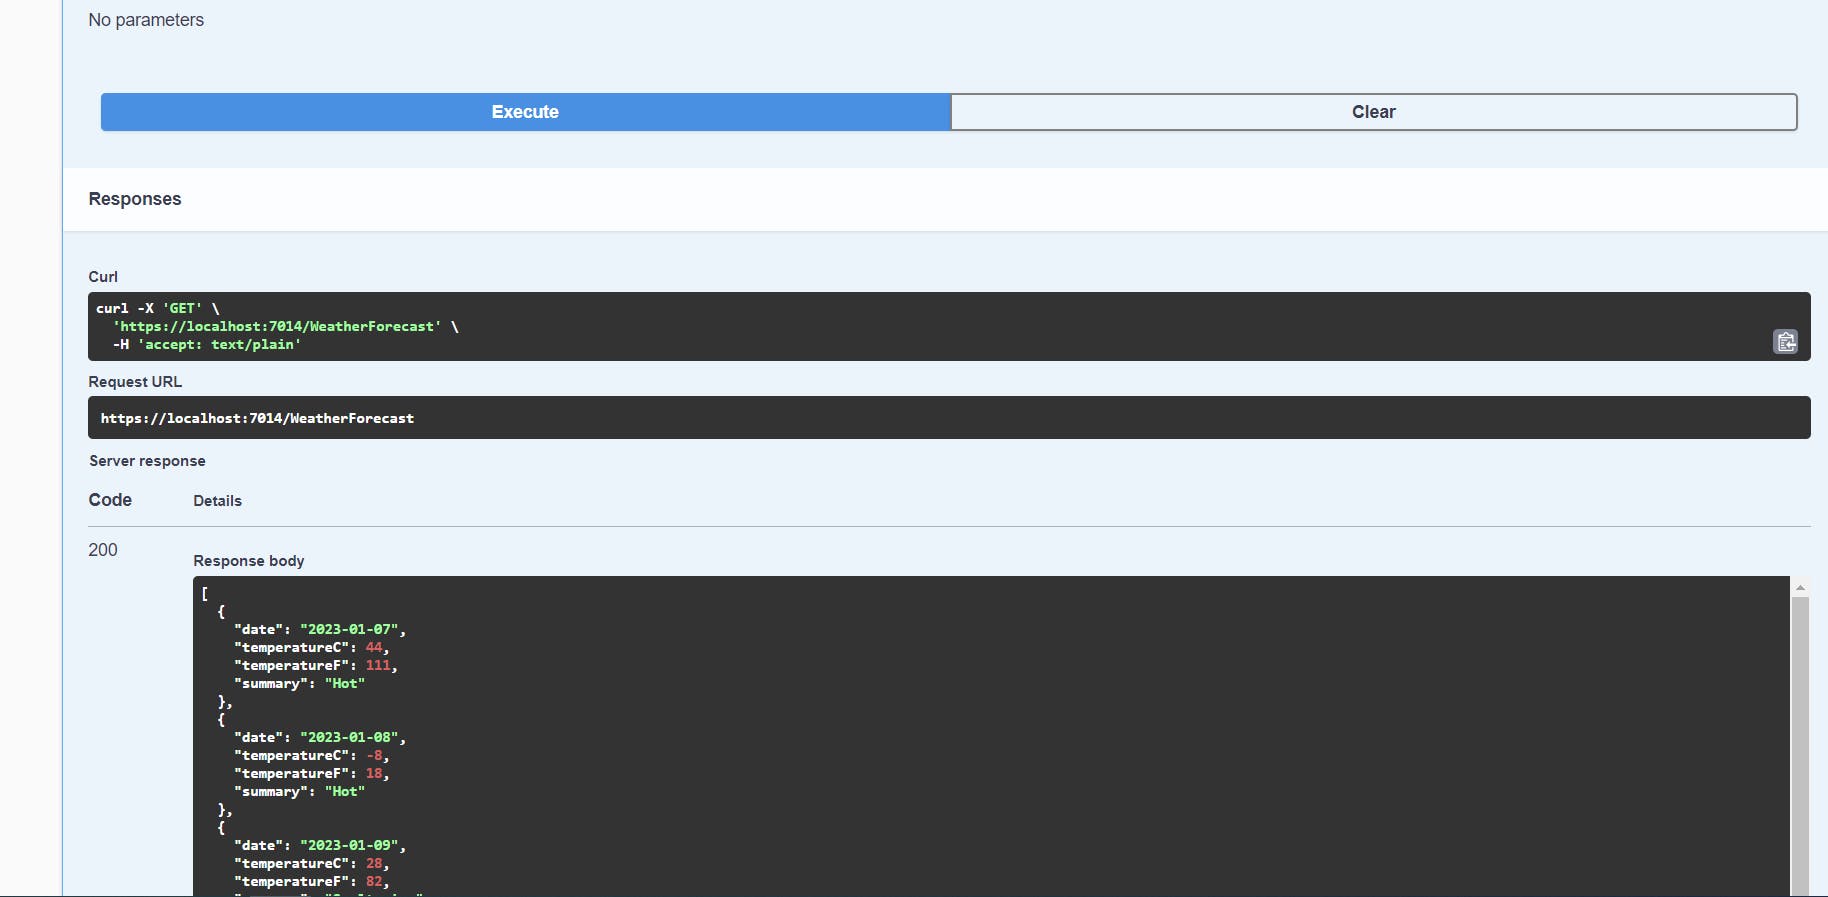
When we run it we will get this endpoint and response pictures below.


Now let's add the NuGet package from Package Manager Console
Install-Package AspNetCoreRateLimit
For basic usage, there are 2 places to edit.
Program.cs and appsettings.json
Program.cs
using AspNetCoreRateLimit;

var builder = WebApplication.CreateBuilder(args);

// Add services to the container.
builder.Services.AddOptions();
builder.Services.AddControllers();
// Learn more about configuring Swagger/OpenAPI at https://aka.ms/aspnetcore/swashbuckle
builder.Services.AddEndpointsApiExplorer();
builder.Services.AddSwaggerGen();

// in-memory cache is using to store rate limit counters
builder.Services.AddMemoryCache();

// load configuration from appsettings.json
builder.Services.Configure<IpRateLimitOptions>(builder.Configuration.GetSection("IpRateLimiting"));

// inject counter and rules stores
builder.Services.AddSingleton<IRateLimitConfiguration, RateLimitConfiguration>();
builder.Services.AddInMemoryRateLimiting();

// the clientId/clientIp resolvers use IHttpContextAccessor.
builder.Services.AddSingleton<IHttpContextAccessor, HttpContextAccessor>();

// AspNetCoreRateLimit configuration

var app = builder.Build();

// enable AspNetCoreRateLimit Middleware
app.UseIpRateLimiting();

// Configure the HTTP request pipeline.
if (app.Environment.IsDevelopment())
{
    app.UseSwagger();
    app.UseSwaggerUI();
}

app.UseHttpsRedirection();

app.UseRouting();

app.UseAuthorization();

app.MapControllers();

app.Run();
appsettings.json
{
    "Logging": {
        "LogLevel": {
            "Default": "Information",
            "Microsoft.AspNetCore": "Warning"
        }
    },
    "AllowedHosts": "*",
    "IpRateLimiting": {
        "EnableEndpointRateLimiting": false,
        "StackBlockedRequests": false,
        "RealIpHeader": "X-Real-IP",
        "HttpStatusCode": 429,
        "GeneralRules": [
            {
                "Endpoint": "*",
                "Period": "1m",
                "Limit": 2
            }
        ]
    }
}
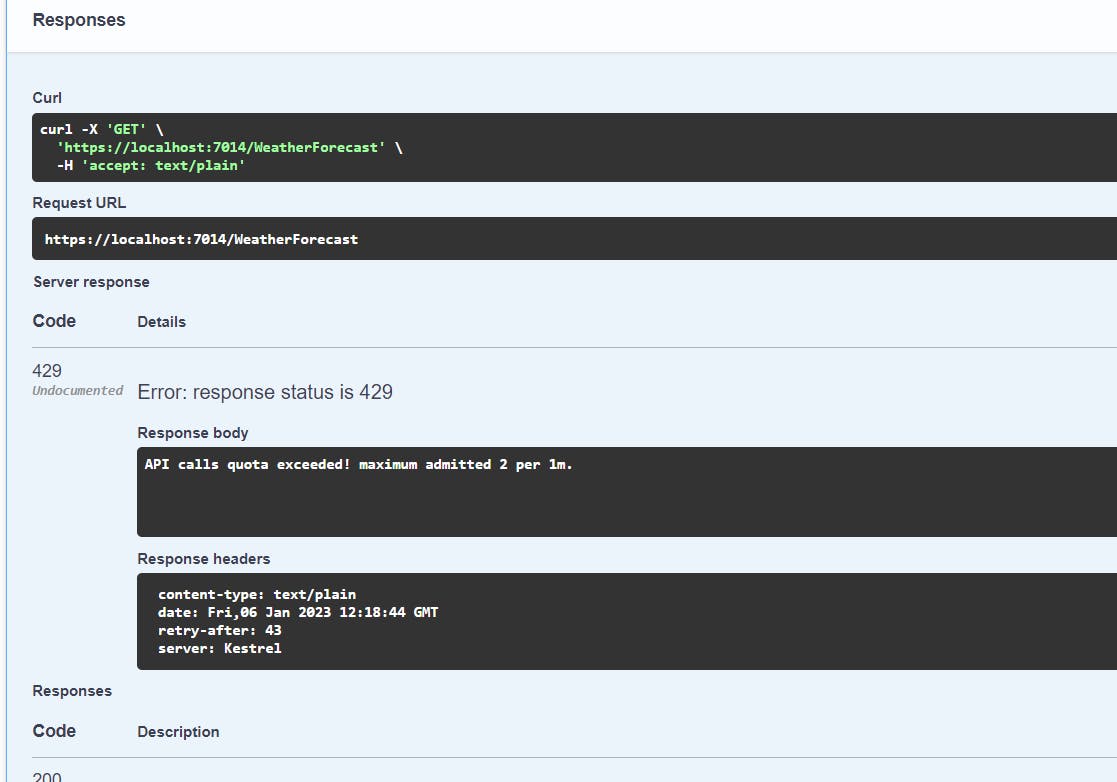
Output

Also, you can add configuration for specific endpoints by changing "EnableEndpointRateLimiting": false to "EnableEndpointRateLimiting": true
"IpRateLimiting": {
        "EnableEndpointRateLimiting": true,
        "StackBlockedRequests": false,
        "RealIpHeader": "X-Real-IP",
        "HttpStatusCode": 429,
        "GeneralRules": [
            {
                "Endpoint": "get:/SomeEndPoint/*",
                "Period": "10s",
                "Limit": 5
            },
            {
                "Endpoint": "*",
                "Period": "1s",
                "Limit": 20
            }
        ]
    },
You can find more details about this middleware and NuGet package and other configuration options in the GitHub repository. You can find the source code here
